Howto migrate from Webpacker to jsbundling-rails in Ruby on Rails
Reading time: 9 minutes
A lot of Ruby on Rails applications created with Ruby on Rails version 5.x or 6.x or even upgraded from the previous versions are using webpacker as their primary asset pipeline. But now as webpacker has retired, it is time to move on. jsbundling-rails is or will be the most obvious step to go. Don’t try to move to importmap-rails directly, as you may encounter more problems you have to solve.
If you are using webpack(er) for CSS too as I did, I recommend moving your CSS pipeline to an alternative before moving your JavaScript setup to an alternative like jsbundling-rails or importmap-rails. Check this: Howto migrate from Webpacker to cssbundling-rails in Ruby on Rails for CSS.
Why move at all?
As previously said, webpacker was sunset and development already stopped in 2021. Also, webpacker has a lot of old dependencies, especially webpack version 3 which can’t be upgraded.
Webpacker suffers a lot of problems that were never solved and now never would be solved at all. It was pretty hard to set up, but delivered quite a lot of useful and needed features back in the days when only sprockets-rails were the only option for handling assets.
Prepare your project
First of all, you have to upgrade your project to at least rails 6.1.x (better rails 7.0.x) as it has everything prepared to get your project on jsbundling-rails. According to Gemfile from jsbundling-rails Ruby on Rails 6.1.0 is the minimum version.
I’ve tried to get all of my projects to the up-to-date Ruby on Rails (current is 7.0) before I tackle such issues. But this is your decision. Ruby on Rails 6.1.X is enough for this step.
Moving images delivered through webpack(er) first
If you have loaded images through webpacker, you should move them before installing jsbundling-rails. As soon as you remove webpacker from your build system, all pack links will be broken.
You can search for them using grep or ag:
# Using grep
grep -R "_pack_" app/
# Using ag
ag "_pack_" app/
HINT: Search in app/ instead of app/views as your project might have helpers or other things, which may use paths from pack.
Install jsbundling-rails gem
Installing jsbundling-rails is pretty straightforward:
./bin/bundle add jsbundling-rails
You can also add it through your favorite editor to the Gemfile and run bundle install to install it.
Select and run the setup for your project
jsbundling-rails has three different install options you can use:
I prefer using webpack as the first step, as most of the things will stay the same and you don’t need to tackle differences to esbuild or rollup. In my experience, most projects will be able to migrate to esbuild directly.
Check which one you prefer and run:
./bin/rails javascript:install:[esbuild|rollup|webpack]
I’ll explain how to use esbuild here. But most things are the same for all three of them.
Load application.js built by jsbundling-rails
If you are not using application.html.erb as your primary layout file or you
have different layout files, align the changes to your needs:
-    <%= javascript_pack_tag 'application', 'data-turbolinks-track': 'reload'
+      'data-turbolinks-track': 'reload' %>
+    <%= javascript_include_tag 'application', 'data-turbolinks-track': 'reload',
+      defer: true %>
As not all applications are running hotwired/turbo before migrating to jsbundling-rails, this part must be aligned to your needs:
data-turbo-trackfor hotwired/turbodata-turbolinks-trackfor turbolinks
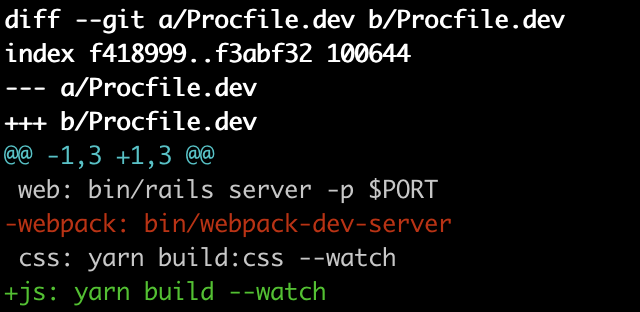
Update Procfile.dev to use es yarn for JavaScript:
diff --git a/Procfile.dev b/Procfile.dev
index f418999..f3abf32 100644
--- a/Procfile.dev
+++ b/Procfile.dev
@@ -1,3 +1,3 @@
 web: bin/rails server -p $PORT
-webpack: bin/webpack-dev-server
 css: yarn build:css --watch
+js: yarn build --watch
Your package.json using esbuild should look similar to this:
diff --git a/package.json b/package.json
index ba79da2..4275619 100644
--- a/package.json
+++ b/package.json
@@ -6,6 +6,7 @@
     "@rails/webpacker": "^5.2.1",
     "bootstrap": "^4.6.0",
     "bootstrap-icons": "^1.10.3",
+    "esbuild": "^0.17.8",
     "jquery": "^3.6.0",
     "popper.js": "^1.16.1",
     "sass": "^1.58.0",
@@ -21,6 +22,7 @@
     "fsevents": "^2.3.2"
   },
   "scripts": {
-    "build:css": "sass ./app/assets/stylesheets/application.scss:./app/assets/builds/application.css --no-source-map --load-path=node_modules"
+    "build:css": "sass ./app/assets/stylesheets/application.scss:./app/assets/builds/application.css --no-source-map --load-path=node_modules",
+    "build": "esbuild app/javascript/*.* --bundle --sourcemap --outdir=app/assets/builds --public-path=assets"
   }
Installing stimulus through gem
Before stimulus was installed using webpack(er) and package.json file.
Everything was separated from Ruby on Rails. To make installation easier
stimulus-rails was built, which
makes installing stimulus a part of rails command line tooling.
First of all, add stimulus-rails to your Gemfile by running this command or
manually:
./bin/bundle add stimulus-rails
As stimulus-rails know whether you have importmap-rails or jsbundling-rails installed, it does the basic setup for you through this command:
./bin/rails stimulus:install
The next step is to load all your existing controllers by adding them to
app/javascript/controllers/application.js through this command:
./bin/rails stimulus:manifest:update
I expect you to use git or any other version control for your project. Just let the stimulus installation overwrite all the existing files and have a look at them. This one makes it simpler to get them running again.
If you want to load all your controllers, have a look at: JavaScript Bundling how to do this.
Importing third party stimulus controllers
If you are using some kind of third party stimulus controllers like from stimulus components or stimulus-use they will be removed by manifest update:
-//Load controller from npm
-import StimulusTomSelect from "stimulus-tom-select";
-application.register("tom-select", StimulusTomSelect);
You need to add them manually after every manifest update, as they get removed.
New JavaScript Entry point
After you have run ./bin/rails javascript:install:[esbuild|rollup|webpack]
there is a new entry point defined in your setup, which is located under
app/javascript/application.js.
To make the migration simpler, just move app/javascript/packs/application.js
to app/javascript/application.js and update to something like:
diff --git app/javascript/packs/application.js app/javascript/application.js

+// Entry point for the build script in your package.json

-// console.log('Hello World webpacker')
+// console.log('Hello World jsbundling-rails')


import Turbolinks from "turbolinks"
Turbolinks.start()

// Load and start ujs
import Rails from "@rails/ujs"
Rails.start()

// Channels
-// import "channels"
+// import "./channels"

// Import controllers/index.js
-import "controllers"
+import "./controllers"

// Bootstrap and jQuery
-import "src/bootstrap_custom"
+import "./src/bootstrap_custom"
Before webpack did the lookup by trying the local path first and then lookup in
node_modules. Now you need to define, that an import is located in the current
path by defining it for every import:
-import "controllers"
+import "./controllers"
You can define a single file like we did with:
-import "src/bootstrap_custom"
+import "./src/bootstrap_custom"
Or you can import a directory by importing the index.js file in a directory
like this:
// Import controllers/index.js
-import "controllers"
+import "./controllers"
Bootstrap 5 Import
Now you need to import Bootstrap 5 related JavaScript code and setup tooltips and popover to work.
If you are on Bootstrap 5 and turbolinks it will look something like this:
import * as bootstrap from 'bootstrap'

document.addEventListener("turbolinks:load", function() {
  var tooltipTriggerList = [].slice.call(
  document.querySelectorAll('[data-bs-toggle="tooltip"]'))

  var tooltipList = tooltipTriggerList.map(function (tooltipTriggerEl) {
      return new bootstrap.Tooltip(tooltipTriggerEl)
  })

  var popoverTriggerList = [].slice.call(
  document.querySelectorAll('[data-bs-toggle="popover"]'))

  var popoverList = popoverTriggerList.map(function (popoverTriggerEl) {
    return new bootstrap.Popover(popoverTriggerEl)
  })
})
If you are on Bootstrap 5 with hotwired/turbo it is:
import * as bootstrap from 'bootstrap'

document.addEventListener("turbo:load", function() {
  var tooltipTriggerList = [].slice.call(
  document.querySelectorAll('[data-bs-toggle="tooltip"]'))

  var tooltipList = tooltipTriggerList.map(function (tooltipTriggerEl) {
      return new bootstrap.Tooltip(tooltipTriggerEl)
  })

  var popoverTriggerList = [].slice.call(
  document.querySelectorAll('[data-bs-toggle="popover"]'))

  var popoverList = popoverTriggerList.map(function (popoverTriggerEl) {
    return new bootstrap.Popover(popoverTriggerEl)
  })
})
Bootstrap 4 Import
Now you need to import Bootstrap 4 related JavaScript code and setup tooltips and popover to work. Bootstrap 4 still needs jQuery to work, that’s why it must be imported first.
If you are using Bootstrap 4 with turbolinks:
+// jQuery as global
+export { $ } from 'jquery'

// Import everything
import * as bootstrap from 'bootstrap'

document.addEventListener("turbolinks:load", function() {
  var tooltipTriggerList = [].slice.call(
  document.querySelectorAll('[data-bs-toggle="tooltip"]'))

  var tooltipList = tooltipTriggerList.map(function (tooltipTriggerEl) {
      return new bootstrap.Tooltip(tooltipTriggerEl)
  })

  var popoverTriggerList = [].slice.call(
  document.querySelectorAll('[data-bs-toggle="popover"]'))

  var popoverList = popoverTriggerList.map(function (popoverTriggerEl) {
    return new bootstrap.Popover(popoverTriggerEl)
  })
})
If you are using Bootstrap 4 with hotwired/turbo:
+// jQuery as global
+export { $ } from 'jquery'

// Import everything
import * as bootstrap from 'bootstrap'

document.addEventListener("turbo:load", function() {
  var tooltipTriggerList = [].slice.call(
  document.querySelectorAll('[data-bs-toggle="tooltip"]'))

  var tooltipList = tooltipTriggerList.map(function (tooltipTriggerEl) {
      return new bootstrap.Tooltip(tooltipTriggerEl)
  })

  var popoverTriggerList = [].slice.call(
  document.querySelectorAll('[data-bs-toggle="popover"]'))

  var popoverList = popoverTriggerList.map(function (popoverTriggerEl) {
    return new bootstrap.Popover(popoverTriggerEl)
  })
})
Remove webpack(er) from your project
First of all remove everything webpacker related from your Gemfile:
-# Install webpacker
-gem 'webpacker', '~> 5.2'

@@ -113,7 +111,6 @@ group :development do
   gem 'capistrano-asdf', require: false
   gem 'capistrano-passenger', require: false
   gem 'capistrano-rails', '~> 1.6', require: false
-  gem 'capistrano-webpacker-precompile', require: false
 end
After removing run bundle install.
Remove JS dependencies
As webpacker has also a lot of JavaScript dependencies, you can now get rid of them too in your package.json:
git diff package.json
diff --git a/package.json b/package.json
index 7340977..3b488f7 100644
--- a/package.json
+++ b/package.json
@@ -4,7 +4,6 @@
   "dependencies": {
     "@hotwired/stimulus": "^3.2.1",
     "@rails/ujs": "^7.0.0",
-    "@rails/webpacker": "^5.2.1",
     "bootstrap": "^4.6.0",
     "bootstrap-icons": "^1.10.3",
     "esbuild": "^0.17.8",
@@ -17,7 +16,6 @@
     "turbolinks": "^5.2.0"
   },
   "devDependencies": {
-    "webpack-dev-server": "^3.11.0"
   },
Now run yarn install and see your yarn.lock file shrink by at least 2900
lines.
This is the great moment where you can run yarn audit again:
% yarn audit
yarn audit v1.22.19
0 vulnerabilities found - Packages audited: 55
✨  Done in 0.33s.
As next step you have to get rid of all webpack(er) related configurations by removing these files:
- config/webpack/ <- just remove the whole directory
- config/webpacker.yml
- app/javascript/packs/ <- just remove the directory
- bin/webpack-dev-server
- bin/webpack
You may have more files to check. Just grep or ag for files:
# use grep
grep -R "webpack" .
# use ag
ag "webpack" .
There may be some dependencies defined in your yarn.lock like this one for @hotwired/stimulus:
% ag "webpack" .
yarn.lock
115:"@hotwired/stimulus-webpack-helpers@^1.0.0":
117:  resolved "https://registry.yarnpkg.com/@hotwired/stimulus-webpack-helpers/-/stimulus-webpack-helpers-1.0.1.tgz#4cd74487adeca576c9865ac2b9fe5cb20cef16dd"
313:    "@hotwired/stimulus-webpack-helpers" "^1.0.0"
Now you can run assets compilation and check, whether it is working without having any webpacker dependencies before deploying your project to staging or even production:
# compile your assets
./bin/rails assets:precompile
# cleanup them afterwards
./bin/rails assets:clobber
If everything is working you should be done with removing webpacker from your project.
Extra: hot reloading in development
Before I used webpack for hot reloading. As webpack is gone, I need an other solution.
There are several solutions you can use to:
- hotwire-livereload
- rails_live_reload
- and many more
In current setup I use rails_live_reload. It is easy to setup and do what it was expected to do. Have a look at the README on GitHub.
Summary
By removing webpacker from your project, you can improve the build time for your assets, fix a lot of JS related security issues by removing the lock on old webpack version. You project will leave the deprecated webpacker setup.
Newsletter
See Also
- Howto migrate from Webpacker to cssbundling-rails in Ruby on Rails for CSS
- Howto remove sprockets-rails from you Ruby on Rails project
- To use or not to use assert_predicate with minitest in Ruby
- Define Default URL for ActiveStorage to fix Mixed Content Error